Knowing how to tie ukulele strings is an essential skill every player should acquire.
It not only aids in keeping your instrument well-maintained and ready to use, but also helps produce the beautiful, melodic strums specific to the ukulele.
In this article, we will go over the necessary materials, describe the types of knots commonly used, walk you through the whole process, and provide useful tips to make this task simpler and more efficient.
Whether you’re a novice just beginning your musical journey, or an experienced musician looking to freshen up your skills, this is the perfect guide to help you learn how to tie ukulele strings effectively and accurately.
Contents
🎶How to tie ukulele strings? (A Step-By-Step Guide)
Tying ukulele strings is a skill every ukulele player, beginner or experienced, needs to know. This write-up has been meticulously created to guide you through the process of how to tie ukulele strings.
Materials Needed:
- Ukulele: We will provide instructions suitable for all types – Soprano, Concert, Tenor, and Baritone.
- Replacement Strings: Choose material suitable for your ukulele, like Nylon, Fluorocarbon, or Wound strings.
- String Winder (optional): This makes the process quicker.
- Guitar Picks for the Bridge (optional): Protect the bridge while pulling the strings.
- Wire cutters or Scissors: To trim the excess string.
- Tuner: To adjust the strings to the correct note.

Preparing the Ukulele
Before installing your new set of ukulele strings, you need to prepare your ukulele by removing the old strings and cleaning the various parts of the instrument.
Removing the Old Strings
It’s important to change the strings of your ukulele one at a time to ensure that the bridge’s tension won’t be loosened excessively and shift out of position.
- Loosening the Tension – Start by loosening the tuning peg at the head of your ukulele to release tension off the string. Turn the tuning peg counter-clockwise slowly until the string is loose enough to easily pull out of the peg.
- Cutting the Strings (optional) – If the string is tightly wound at the tuning peg, you might need to cut it using a wire cutter or scissor. Remember to be careful and only cut the string while it’s loose to avoid sudden movements that could injure you.
- Unknotting and Unfastening From the Bridge – Gently unfasten the string from the bridge at the end of your ukulele. Most strings are either knotted or threaded through a loophole, which should be simple to unfasten now that the string is loose.
- Unwinding From the Tuning Pegs – Now that you have successfully unfastened your string from the bridge, gently unwind it from the tuning peg at the top of your ukulele.
Note: The process should be repeated for all the strings, but replace and tune each string before moving on to the next one.
Cleaning the Ukulele
Once the old strings have been removed, take this opportunity to thoroughly clean your ukulele.
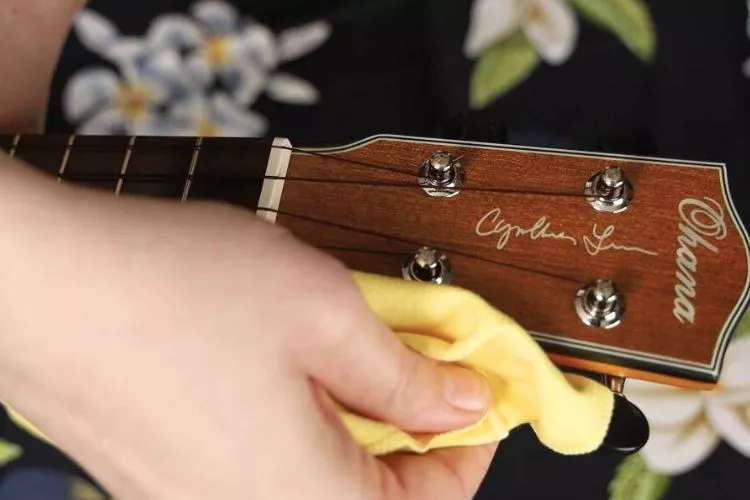
- Fingerboard – Rub a dry cloth along the surface of your fingerboard to remove any accumulated dust or grime. Avoid using water or cleaning solutions that could damage the wood.
- Bridge – Similarly, run your dry cloth along the ukulele’s body, paying special attention to the bridge where the strings are attached.
- Tuning Pegs – Lastly, gently wipe the tuning pegs to clear off any dust present.
Cleaning the ukulele will not only improve the aesthetics of your instrument but also enhance the sound and increase the lifespan of your ukulele strings.
Knot Types
Knowing the right knots to secure your ukulele’s strings is very important to ensure longevity and good sound quality. The three main types of knots you’ll encounter are:
The Standard Knot
An overhand knot is the simplest knot and forms the base for many other knots. It’s similar to the first knot made while tying shoelaces.
- Setup: Hold the end of the string. Make a loop (the initial “O” shape) by bringing the end of the string around to cross over the rest of the string.
- Execution: Bring the end under and through the loop. Pull tight to secure the knot.
This knot is usually used to secure the string to the bridge of the ukulele.
Double Knot
A double knot provides additional hold. This knot is essentially a standard knot done twice, creating a larger and stronger one.
- Setup: Start as you would with a standard knot.
- Execution: Once you’ve made the first standard knot, repeat the process starting from the top of the tied knot.
This knot is commonly used when a standard knot may slip through, like when using a thinner gauge string.
Loop Knot
The loop knot is most commonly used on the tuning peg end of the string. It creates a loop into the string, providing an extra layer of security.
- Setup: Make a loop in the string located at the point where you want the knot to be.
- Execution: Pass the end part of the string through the loop and secure it by pulling through until tight.
A loop should be left at the end which can be used to attach the string to the tuning peg.
Remember that the knot tying technique could partly affect the sound, playability and tuning stability of your ukulele aside from the string quality itself.
Installing New Strings
Putting new strings onto your ukulele involves two main steps: securing the strings to the bridge and the tuning pegs. Here are some detailed guidelines to ease the process.
On the Bridge
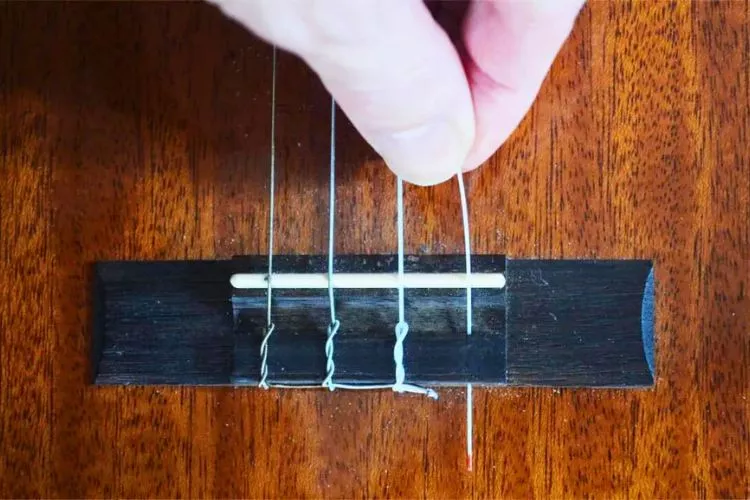
The bridge is the ukulele part on the instrument’s body that anchors the strings. Here’s how to secure ukulele strings to the bridge:
- Locate the G string slot: With the bridge facing you, locate the slot for the G string. The slots are located from left to right in the order of G, C, E, and A for standard ukulele tuning.
- Thread the string through the hole: Take the fresh G string and thread the end through the corresponding hole or slot in the bridge.
- Choose and Tie a Knot: You now must secure your string to the bridge using either the standard or double knot.
- For a standard knot, make a simple overhand knot at the end of the string, large enough that it does not slip through the hole in the bridge.
- For a double knot, after making the first overhand knot, make another overhand knot over the first one to provide extra security.
- Pull the Knot Tight: Ensure that the knot at the end of the string is pulled tight against the base of the bridge.
Repeat this process for the C, E, and A strings in their respective order.
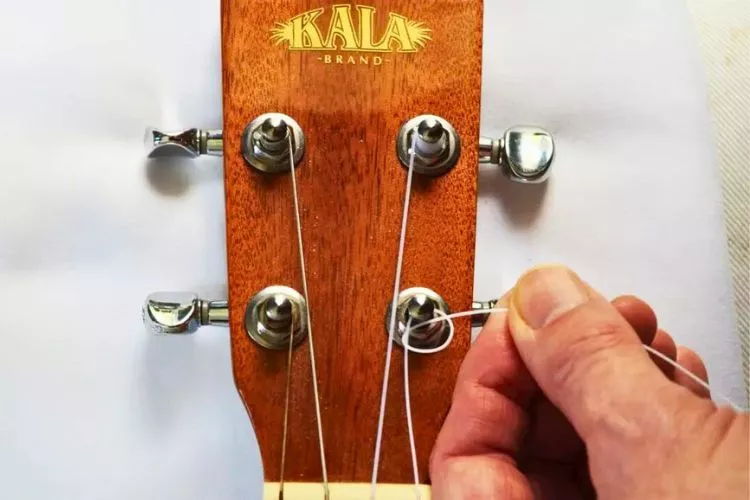
On the Tuning Pegs
The tuning pegs are used to adjust the pitch of the strings on the ukulele. Securing the strings to the tuning pegs should be done carefully to maintain the string’s tension and pitch.
- Thread the String: Run the unknotted end of the G string through the hole in the tuning peg.
- Choose a Winding Method: Decide how to wind the string around the peg.
- For standard wrapping, wind the string around the peg a few times before threading the end back through the hole in the peg. Pull on the end of the string to tighten the wraps.
- For the locking method, make a coil around the peg before threading the string through itself, this will create a lock on the peg.
- For a loop knot, make a loop with the end of the string, thread it through the hole, and secure it by winding the string around itself.
- Ensure Tightness: The strings should be wrapped tightly around the tuning pegs. If the string is loose, it can affect the sound quality and might even fall off.
Follow the same procedure for the rest of the strings in their order – C, E and A. Fill your surroundings with the mesmerizing sound of a well-tuned ukulele once you’ve installed all the strings successfully.
Fine Tuning
After you’ve installed new strings on your ukulele, they need to be fine-tuned to ensure a proper sound. New strings often go out of tune easily in the first few days, so frequent readjustments might be needed.
Stretching the Strings
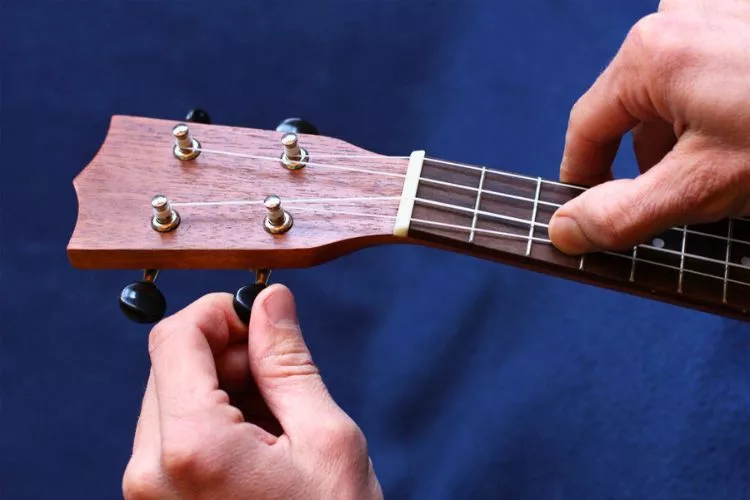
Stiff, new strings often take a few hours of playing to naturally stretch and reach their perfect pitch. To expedite this process:
- Pluck the string in the middle to create vibration. Position your fingers above and below the string, in the middle of the fretboard.
- Gently stretch the string by pulling it upwards from the fretboard and move your fingers along the string while stretching, from the top to bottom.
Note: Do this process slowly and gently to avoid snapping a string.
Tuning the Ukulele
Even slightly off-tune strings can make your whole ukulele sound out of harmony. To tune your ukulele:
- Get a tuner: Use an electronic tuner for the most accurate tuning. These can be apps installed on a mobile device or standalone devices.
- Tune each string individually: Start by plucking the G string, and while letting the string vibrate, adjust the tuning peg until the tuner indicates that the note is in tune. Repeat this step for each string in the order of G, C, E, and A for standard ukulele tuning.
Trimming Excess String
After your ukulele is in tune, any loose string ends that are still hanging can be trimmed to make your instrument look neater.
- Plan the cutting point: Don’t cut too close to the knots or pegs. Leaving about an inch of excess after the knot should avoid accidental loosening.
- Cut the string: Carefully cut the excess string using a wire cutter or scissors.
Note: Always use caution while doing this to avoid injuring yourself or cutting the wrong part of the string.
Tips and Tricks
Avoid String Slippage with the Locking Method or Double Knot
- The Locking Method involves looping the string around itself to create a secure grip. To apply the locking method, insert the string through the hole in the tuning peg and pull it tight. Wrap it around the peg, and loop it under the excess string. Finally, pull the loop tight to create a secure lock.
- Double Knot: The double knot is another effective method to prevent string slippage. Simply tie a standard knot and then form a second knot on top of the first one for added security.
Maintain Your Ukulele for Enhanced String Longevity
- Regularly clean your ukulele to prevent dirt and sweat from damaging the strings and instrument.
- Store your ukulele in a humidified case to prevent warping or cracking.
- Avoid exposing your ukulele to extreme temperature fluctuations and direct sunlight.
- Keep your ukulele well-tuned; the correct tension can help prevent string breakage.
Practice Quick String Changes
- Familiarize yourself with the correct method of looping, tightening, and positioning the strings.
- Keep a set of replacement strings, string winder, and a wire cutter handy for a quick and efficient string change.
- Practice changing strings regularly to enhance efficiency and reduce the time spent on string changes.
Regularly Check the Bridge and Nut of Your Ukulele
- Inspect the bridge and nut for cracks, wear, or other defects affecting the string’s tension and longevity.
- Clean the bridge and nut with a soft brush or cloth to remove dirt and debris.
- Consider applying a drop of lubricant to the nut slots to reduce friction and wear.
By following these tips and tricks, you can ensure that tying your ukulele strings is a hassle-free and successful.
Regular practice and proper maintenance can improve the overall performance of your instrument and contribute to an enjoyable playing experience.
🎶Frequently Asked Questions (FAQs)
Ukuleles are usually strung in the order of G, C, E, A from top to bottom. The top G string is typically lower-pitched, the C string is the lowest, the E string is higher, and the A string is the highest.
First, remove the broken string from the tuning peg and the bridge hole to fix a popped ukulele string. Insert the new string through the bridge hole and tie a knot at the end. Thread the other end of the string through the corresponding tuning peg hole and wind it carefully until the string is securely in place and correctly tuned.
Ukulele strings should neither be too tight nor too loose. They should be tightened enough to play the correct notes when fingered, which requires a fair amount of tension. However, they shouldn’t be so tight that they risk snapping or damaging the ukulele.
The cost to get a ukulele restrung depends on factors such as the type of strings used and labor costs if you are not restringing it yourself. Standard ukulele strings can range from $5 to $15, while professional restringing services can cost between $10 and $20.
First, to fasten ukulele strings, slip the string through the bridge hole and secure it with a knot. Next, feed the other end through the corresponding tuning peg hole. Tighten the string by turning the tuning peg until the string has achieved the necessary tension to play the correct note.
Conclusion:
Learning how to tie ukulele strings may initially appear challenging, but with patience, perseverance, and a little guidance, it can quickly become a fundamental part of your musical journey.
Understanding the proper approach can ensure your strings’ longevity and significantly enhance your playing experience.
