Properly leveled guitar frets play a vital role in achieving flawless playability and perfect intonation.
Whether you’re an aspiring musician or a seasoned guitarist, understanding how to level guitar frets is crucial for maintaining your instrument’s optimal performance.
In this comprehensive guide, we’ll provide a step-by-step approach to help you master the art of fret leveling.

By following our instructions and incorporating expert tips, you’ll be able to enhance your guitar’s playability and ensure a smooth and enjoyable playing experience.
Contents
🎶Understanding Fret Leveling
Fret leveling is a technique that involves removing any unevenness or high spots on your guitar’s fretboard.
This process ensures that each fret is level and consistent, allowing for accurate intonation and a comfortable playing experience.
Fret leveling becomes necessary when you notice buzzing or dead spots on the fretboard or when the notes played on certain frets are not in tune.

To begin, gather the tools needed for the fret leveling process. These include a leveling beam, sandpaper of various grits, a small ruler or straightedge, masking tape, and a marker.
It’s essential to understand the common misconceptions about fret leveling, such as assuming it can be done with a simple fret dressing or polishing.
Fret leveling involves more precision and attention to detail, requiring the use of specialized tools.
🎶Preparing for Fret Leveling
Before diving into the fret leveling process, it’s important to assess the condition of your guitar’s frets and identify any high spots.
Start by examining the frets for signs of wear or flat spots using a straightedge or ruler. Gently slide the straightedge along the frets, focusing on the areas where the strings contact the frets.

Next, check for any neck relief by holding down the first and last fret simultaneously and observing the gap between the bottom of the string and the top of the frets.
The ideal gap should be minimal, about the thickness of a business card. Adjust the truss rod if necessary to achieve the desired neck relief.
To protect your guitar during the fret leveling process, remove the strings and cover the body with a soft cloth or towel. This prevents any accidental scratches or damage while working on the fretboard.
🎶How to level guitar frets Step-by-Step Guide to Fret Leveling?
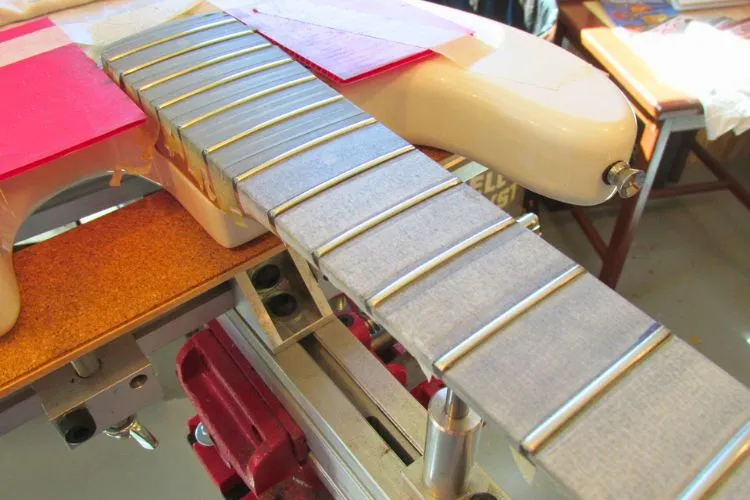
Securing the guitar for work is crucial to ensure stability during the fret leveling process. Place the guitar on a flat surface and use specially designed supports or clamps to hold it in place. This minimizes movement and provides a steady working environment.
Next, attach the appropriate grit sandpaper to the leveling beam. Start with a coarser grit, such as 320, and gradually work your way up to finer grits, such as 400 and 600.
Moving the leveling beam in a back-and-forth motion, carefully sand the frets by applying even pressure across the entire fretboard.
While sanding, pay close attention to the high spots and work on leveling each individual fret. Use a marker to mark the tops of the frets, allowing you to observe any inconsistencies in the leveling process.
Continue sanding until the marker lines are completely removed from each fret. Be patient and take your time to achieve a smooth and even surface.
Fret Crowning and Polishing
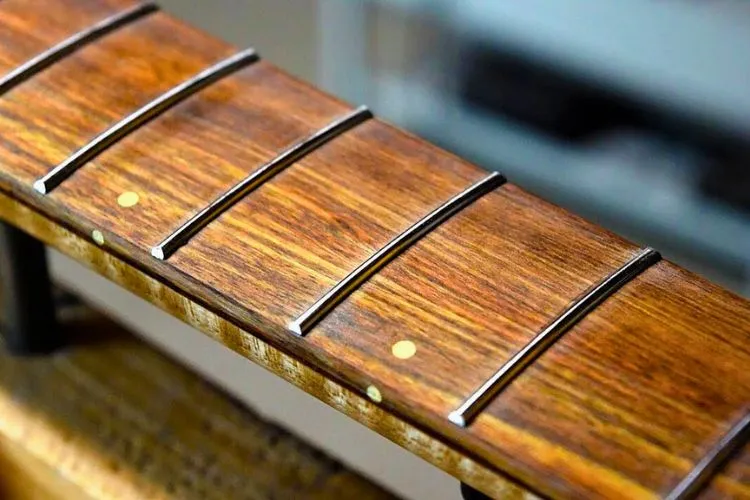
After leveling the frets, the next step is to crown them. Fret crowning involves rounding the tops of the leveled frets to restore their original shape and ensure optimal playability.
Use a specialized crowning file, also known as a fret file, to reshape the flat tops into a gently rounded profile. Work in a controlled manner, exerting precise pressure to avoid removing excess material.
Once the crowning is complete, it’s important to polish the frets for smooth playing. Utilize a fret polishing compound and a polishing pad or cloth to bring the frets to a high shine.
Move the pad or cloth in a back-and-forth motion along the entire length of each fret, ensuring a consistent finish.
Fine-tuning and Adjustments
After fret leveling, it’s crucial to check the fretboard for any remaining high spots. Play each string, noting if any buzzing or dead spots are still present. If necessary, use a fret rocker or straightedge to identify the specific fret causing the issue.
Subsequently, go back and repeat the leveling, crowning, and polishing process for the problem fret(s) until all issues are resolved.
Additionally, adjusting your guitar’s setup and intonation is essential for achieving optimal playability. Make any necessary truss rod adjustments, bridge height modifications, and saddle adjustments to ensure proper action and intonation.
This step may require some trial and error, but it significantly contributes to the overall playability of your instrument.
🎶Pro Tips and Troubleshooting
While fret leveling can be a complex process, here are some pro tips to guide you:
- Take it slow and be patient: Fret leveling requires precision and attention to detail, so don’t rush through the process. Take your time and focus on each individual fret.
- Inspect the fretboard carefully: Thoroughly examine the fretboard for any signs of wear, high spots, or irregularities. Identifying these issues beforehand will help you address them effectively.
- Test for buzz and dead spots: Regularly test your guitar for any buzzing or dead spots. This will help you identify areas that may require leveling or adjustment.
🎶frequently asked question (FAQs)
It depends on how frequently you play and the amount of wear your guitar experiences. As a general guideline, consider fret leveling every few years or whenever you notice issues with playability and intonation.
Although it’s possible to attempt fret leveling without professional tools, it’s not recommended. Specialized tools are designed to provide accuracy and minimize the risk of causing damage to your instrument.
Buzzing or dead spots, inconsistent intonation, and excessive string height are common signs of uneven frets.
When done properly, fret leveling should not significantly impact the tone of your guitar. It will, however, greatly improve playability and intonation, which ultimately enhance your overall playing experience.
Conclusion:
With this step-by-step guide, you can now confidently tackle guitar fret leveling like a pro. Remember to approach the process with patience and precision, and always prioritize the well-being of your instrument.
By diligently leveling, crowning, and polishing your guitar’s frets, you’ll achieve flawless playability and optimal intonation.
Implement the pro tips and troubleshooting advice to overcome any challenges you may encounter along the way.
With a properly leveled fretboard, your guitar will unlock its true potential, making your playing sessions truly enjoyable and allowing you to express yourself fully through music.
